
BikeBerry․com Install Guide: A Comprehensive Plan
BikeBerry․com provides detailed installation videos and support at 18003170479, ensuring a smooth experience with your engine kit․
BikeBerry Engine Kits represent a fantastic way to motorize your bicycle, offering an exciting and affordable alternative to traditional transportation․ These kits are designed for enthusiasts seeking a fun and engaging project, transforming a standard bike into a motorized marvel․ BikeBerry․com caters to a diverse range of riders, providing various engine sizes and configurations to suit individual needs and preferences․
Before embarking on the installation process, it’s crucial to understand that these kits are intended for off-road use only․ Always prioritize safety and adhere to local regulations regarding motorized bicycles․ BikeBerry․com provides comprehensive resources, including installation guides and support, to ensure a successful and enjoyable experience․ The kits include all necessary components, but a basic understanding of mechanical principles is highly recommended․
Understanding Kit Contents
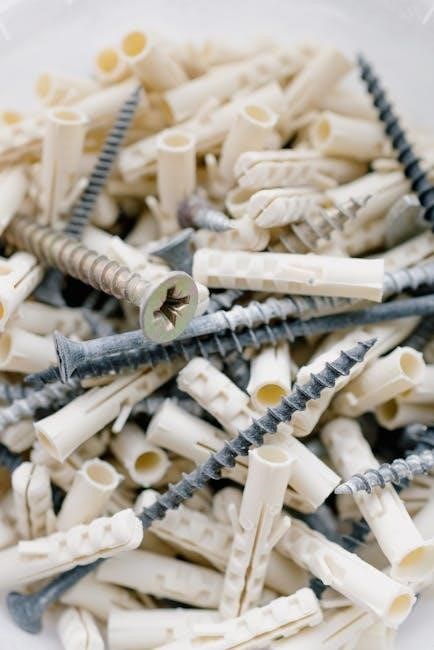
Your BikeBerry Engine Kit arrives with a comprehensive set of components, carefully packaged for ease of installation․ Expect to find the engine itself, a fuel tank, fuel lines, a muffler exhaust system, and a carburetor․ Crucially, the kit includes all necessary mounting hardware, ensuring compatibility with most bicycle frames․ A clutch assembly is also provided, enabling smooth power transfer from the engine to the rear wheel․
Before beginning, carefully inventory all parts against the included parts list․ This ensures nothing is missing and familiarizes you with each component․ Pay close attention to smaller items like gaskets, bolts, and washers, as these are vital for a secure and leak-proof installation․ BikeBerry․com’s installation guides detail each part’s function and placement, aiding in a streamlined setup process․
Safety Precautions Before Installation
Prioritizing safety is paramount before commencing any installation․ Always disconnect the spark plug wire to prevent accidental engine starting during the process․ Work in a well-ventilated area, as gasoline fumes are flammable and hazardous to inhale․ Wear appropriate safety glasses to protect your eyes from debris, and gloves to shield your hands․
Ensure the bicycle is securely mounted on a stable work stand to prevent tipping․ Familiarize yourself with the engine’s hot components, such as the exhaust system, and avoid contact when the engine is running or recently shut off․ Keep flammable materials away from the work area․ BikeBerry․com strongly recommends reviewing the entire installation guide before starting, understanding each step and potential hazard․

Installation Process: Step-by-Step
Begin by carefully mounting the engine to the prepared frame, then proceed with fuel tank and muffler exhaust system installation, following BikeBerry․com’s guide․
Frame Preparation and Mounting the Engine
Prior to engine mounting, thoroughly inspect your bicycle frame for any existing damage or weaknesses․ Ensure the frame is robust enough to handle the added weight and stress of the engine kit․ Carefully clean the mounting points on the frame, removing any rust or debris to guarantee a secure connection․
BikeBerry․com recommends utilizing the provided mounting brackets and hardware, ensuring proper alignment with the frame’s designated areas․ Securely attach the engine to the frame, tightening all bolts to the manufacturer’s specified torque․ Double-check all connections to prevent loosening during operation․ Proper mounting is crucial for stability and safe operation, so take your time and verify each step․ A misaligned or loosely mounted engine can lead to performance issues and potential hazards․
Fuel Tank and Fuel Line Installation
Begin by securely mounting the fuel tank to the bicycle frame, utilizing the provided brackets and ensuring it’s positioned away from direct engine heat․ Connect the fuel line from the tank to the carburetor, making sure the line is free from kinks or obstructions that could restrict fuel flow․ BikeBerry․com emphasizes using fuel-resistant line clamps to prevent leaks and maintain a secure connection․
Inspect all connections thoroughly for tightness before proceeding․ Pay close attention to the fuel line routing, keeping it clear of moving parts and potential pinch points․ A secure and properly routed fuel system is vital for reliable engine performance and safety․ Remember to consult the manual for specific instructions related to your kit model, ensuring correct installation and preventing potential fuel delivery issues․
Muffler Exhaust System Installation
Carefully attach the muffler exhaust system to the engine’s exhaust port, utilizing the provided gasket and hardware to ensure a tight seal․ BikeBerry․com recommends applying a small amount of high-temperature sealant to the gasket for optimal leak prevention․ Securely mount the muffler to the bicycle frame, avoiding contact with any flammable materials or components․
Ensure the exhaust pipe is routed away from the rider and any sensitive parts of the bicycle․ Proper exhaust system installation is crucial for reducing noise levels and directing exhaust gases safely away from the operator․ Double-check all connections for tightness and stability before starting the engine, referencing the manual for specific torque specifications․
Engine Setup and Configuration
Proper carburetor and clutch adjustments, alongside correct fuel mixture ratios (initially 24:1), are vital for peak engine performance and longevity․
Carburetor Adjustment
Achieving optimal carburetor performance is crucial for a smooth running engine․ Begin by ensuring the engine is warmed up to its normal operating temperature․ Locate the idle speed screw, typically found on the carburetor body, and adjust it to achieve a stable idle․

Next, carefully adjust the fuel mixture screw – turning it clockwise leans the mixture, while counterclockwise richens it․ Monitor the engine’s response; a lean mixture may cause stalling or overheating, while a rich mixture can lead to excessive smoke and poor fuel economy․
Fine-tune the mixture screw until the engine responds crisply to the throttle․ Remember, slight adjustments can make a significant difference․ Consult the BikeBerry․com installation videos for visual guidance and specific instructions tailored to your engine kit model․ Proper adjustment ensures efficient combustion and maximizes engine power․
Clutch Adjustment Guide
Proper clutch adjustment is vital for smooth gear changes and preventing slippage․ Sometimes, the clutch bevel wheel inside the motor can be too tight due to manufacturing tolerances․ Begin by loosening the clutch cable adjustment lock nut․

Then, slowly tighten or loosen the cable adjustment screw to achieve the correct clutch lever free play – typically around 1/8 to 1/4 inch․ Insufficient free play can cause the clutch to slip, while excessive free play can result in difficulty engaging gears․
Test the clutch by attempting to shift through the gears․ If slippage occurs, slightly tighten the cable․ Refer to BikeBerry․com’s installation videos for a detailed visual demonstration of this process, ensuring optimal clutch performance and longevity․
Fuel Mixture Ratios – Break-In Period (24:1)
During the initial break-in period, maintaining the correct fuel mixture is crucial for engine longevity and performance․ BikeBerry recommends a fuel ratio of 24:1 – this translates to 56 ounces of high-quality two-stroke oil per gallon of gasoline․
This rich mixture provides extra lubrication for the piston and cylinder during the critical wear-in phase․ It’s essential to use a reputable brand of two-stroke oil specifically designed for air-cooled engines․
Continue using this 24:1 ratio for the first four tanks of fuel․ After the break-in period, you can transition to a leaner mixture as specified in the BikeBerry engine kit manual, optimizing fuel efficiency and power output․

Post-Installation Checks and Maintenance
Thoroughly check for fuel leaks and adjust chain tension after installation; proper maintenance ensures optimal performance and extends the life of your BikeBerry engine․
Initial Engine Start-Up Procedure
Before the very first start, double-check all connections – fuel lines, carburetor, and exhaust – ensuring everything is secure․ Verify the fuel tank contains the correct 24:1 fuel mixture, crucial for the initial break-in period covering the first four tanks․
Turn the fuel petcock to the ‘ON’ position․ Engage the choke, especially in cooler temperatures, and gently pedal to initiate engine rotation․ Avoid flooding the engine by limiting choke usage and throttle opening․ Once the engine sputters or attempts to start, gradually reduce the choke․
Allow the engine to idle for a short period, monitoring for any unusual noises or vibrations․ This initial run helps circulate oil and establish proper lubrication․ Be prepared to make minor carburetor adjustments to achieve a smooth idle․ Remember, patience is key during this phase!
Checking for Fuel Leaks
Post-installation, a thorough fuel leak check is paramount for safety․ Before starting the engine, carefully inspect all fuel lines, connections at the fuel tank, carburetor, and fuel filter for any signs of leakage․ Pay close attention to the fittings and clamps, ensuring they are tightly secured․
With the engine off, gently turn the fuel petcock to the ‘ON’ position and observe the fuel lines․ Look for drips, dampness, or any fuel accumulation around the connections․ If leaks are detected, immediately turn the fuel off and tighten the connections or replace damaged components․
After the initial engine start, repeat the inspection while the engine is running․ A visual check under various engine speeds will reveal any leaks that may only appear under pressure․ Address any leaks promptly to prevent fire hazards․
Chain Tension Adjustment
Proper chain tension is crucial for efficient power transfer and preventing premature wear․ After installing the engine kit, verify the chain has the correct slack․ A typical range is between 1/2 to 1 inch of vertical movement midway between the sprocket gears․
To adjust, loosen the rear axle nuts and use the chain adjusters (if equipped) to move the rear wheel backward or forward․ Ensure both sides are adjusted equally to maintain wheel alignment․ After adjustment, tighten the axle nuts to the manufacturer’s specified torque․
Regularly check chain tension, especially during the break-in period, as it can change with initial use․ A too-tight chain strains the engine and sprockets, while a loose chain can derail․ Consistent monitoring extends the lifespan of your drivetrain․

Troubleshooting Common Issues
BikeBerry kits may experience starting, clutch, or fuel delivery problems; consult the manual or BikeBerry․com support at 18003170479 for solutions․

Engine Not Starting
If your BikeBerry engine fails to start, systematically check several key components․ First, verify the fuel tank contains a proper fuel mixture – initially a 24:1 ratio (56oz oil per gallon) for the first four tanks, as per the manual․
Ensure the fuel line isn’t kinked and that fuel is reaching the carburetor․ Next, inspect the spark plug; it should be clean and properly gapped․ Confirm a strong spark by testing with a spark plug tester․
Also, double-check the carburetor adjustment and clutch engagement․ A too-tight clutch bevel wheel, a manufacturing possibility, can hinder starting․ If issues persist, contact BikeBerry․com customer support at 18003170479 for expert assistance and refer to their installation videos for visual guidance․
Clutch Slippage
Experiencing clutch slippage with your BikeBerry engine kit? This often indicates an issue with the clutch assembly itself․ The manual notes that, due to manufacturing tolerances, the clutch bevel wheel inside the motor can sometimes be too tight․ Carefully inspect and, if necessary, adjust the clutch according to the BikeBerry․com installation guide․
Ensure the clutch cable has the correct amount of free play; too much or too little can cause slippage․ Verify the clutch plates aren’t worn or contaminated with oil․
If adjustment doesn’t resolve the problem, contact BikeBerry․com’s customer support at 18003170479; They can provide further troubleshooting steps or advise on potential replacement parts․ Refer to their online installation videos for a visual demonstration of clutch adjustment procedures․
Fuel Delivery Problems
Encountering fuel delivery issues with your BikeBerry engine kit? Several factors could be at play․ First, meticulously check the fuel lines for any kinks, obstructions, or leaks – a common source of problems․ Ensure the fuel tank vent is clear, allowing proper airflow for fuel flow․ Verify the carburetor is receiving a consistent supply of fuel․
Confirm the fuel mixture ratio is correct, especially during the initial break-in period (24:1 – 56oz oil per gallon)․ A clogged fuel filter can also restrict fuel delivery․
If problems persist, consult the BikeBerry․com installation guide or contact their support team at 18003170479 for assistance․ Their installation videos may offer visual guidance on fuel system troubleshooting․

Resources and Support
BikeBerry․com offers comprehensive installation videos and dedicated customer support at 18003170479, assisting you throughout the entire process․
BikeBerry․com Installation Videos
BikeBerry․com understands that a visual guide can be incredibly helpful during the installation process․ That’s why they’ve created a comprehensive library of installation videos, freely available to all customers․ These videos cover every stage of the installation, from initial frame preparation and engine mounting to fuel system setup and final adjustments․
You can access these valuable resources directly through this link: https://www․bikeberry․com/pages/install-guide․ The videos are designed to be easy to follow, even for those with limited mechanical experience․ They demonstrate each step clearly, providing close-up views of critical components and offering helpful tips to avoid common pitfalls․
By utilizing these videos alongside the written manual, you’ll be well-equipped to successfully install your BikeBerry engine kit and enjoy the thrill of motorized cycling!
Contacting BikeBerry Customer Support (18003170479)
BikeBerry․com is dedicated to providing exceptional customer support throughout your engine kit installation journey․ If you encounter any difficulties or have questions that aren’t addressed in the installation guide or videos, their knowledgeable support team is ready to assist you․

You can reach BikeBerry Customer Support directly by calling 18003170479․ Their representatives are available to provide guidance, troubleshoot issues, and offer solutions to ensure a smooth and successful installation․ Don’t hesitate to reach out – they are committed to helping you get your engine kit up and running!
BikeBerry strives to make the installation process as straightforward as possible, and their support team is a valuable resource to help you achieve that goal․